Not for techies: NFTs for everyone–Pt. 2
In part two of his three-part NFT series, Roberto Cano explains how to use the Rinkeby testnet to deploy and test an NFT.
Welcome back, my fellow developer! Hope you had fun with our last article. If you don’t know what I’m talking about, you can check out the first installment of the series here.
In this series of 3 articles, we’ll be exploring the intricacies of the blockchain and smart contract development by creating our own NFT. Fear not! The series strives to be approachable to non-techies. If you consider yourself one of them, or if you are a techie but have never touched anything blockchain related, you are in the right place!
Our journey is bringing us to the following exciting places:
-
- First Gear (see part 1)
- ERC721, the secret identity of an NFT
- Remix IDE, or how to deploy an NFT directly from your browser
- Niftie!, your very first baby NFT
- Second Gear
- Rinkeby, the gas-saver god that will allow you to test your NFT without spending a penny
- IPFS, the Interplanetary File System that will skyrocket your art piece
- Hitting a Pinata, or how to make your art stick hard and not get lost
- Sailing with your NFT into the OpenSea (and not getting stranded)
- Full Throttle
- Floating high with the OpenZeppelin while avoiding the Hindenburg effect
- First Gear (see part 1)
- NFT for real: going full Main…netand living the dream life
We’ve already been in First Gear. Now, it’s time to get serious–but not too serious. We’ll lose the break and pump the gas hard to enter our Second Gear. Let’s go!
Disclaimer
This guide assumes that you already know a bit about Ethereum. You should at least have a functioning wallet and your wallet address at hand. If you don’t, you can install Metamask by following this article:
https://metamask.zendesk.com/hc/en-us/articles/360015489531-Getting-started-with-MetaMask
Second Gear
Here we are, running fast into the blockchain, pumping gas, and burning NFTs! In Second Gear, we’ll be taking little Niftie–our baby NFT we raised in the first part of the series–and sending her to high school, where all the big kids are.
Remember, Niftie can already say her long name, her short name, who her owner is and provide a URL that indicates where our art is. Let’s remember what the code looked like:
// SPDX-License-Identifier: MIT
pragma solidity ^0.8.0;ontractNiftie{
string publicname= "Niftie";
string public symbol= "NFTY";
address[] publicownerOf= [<your address>];
string[] publictokenURI= ["<some URL here>"];
}
This is great. However, for our little Niftie to graduate, first we need to test on a real blockchain!
“Oh! A real blockchain?”, you scream in disbelief.
Yes, a real blockchain! However, a real one like Ethereum costs money. We are still learning, and we may make mistakes, which means we could be spending some cash on something that doesn’t work. So how do developers test their smart contracts before they release them to the world?
The answer is: on a testnet! A testnet is nothing more and nothing less than a blockchain, just like Ethereum. It works in the same way. It has nodes, validators and an Ether currency of its own. The only difference is that you don’t need real money to get Ether on a testnet. Instead, you can politely ask for some of it, and it will be provided.
Ethereum actually has several testnets, and each one of them can be used for different purposes. In contrast, the Ethereum project has only one Mainnet, which is where the real projects live and where the real money is used. For our little project, we will be using one of the most stable testnets. Let’s go meet the benevolent god of the Ethereum blockchain: Rinkeby, the gas-saver!
Rinkeby
Setup on Metamask
Welcome to the realm of the unknown! You are getting closer to being a real developer, and the omnipotent Rinkebywill aid you in your journey.
Rinkeby, one of the many Ethereum testnets, is the perfect playground for you to test your blockchain projects. You can get a taste of what it is like to deploy and test on Ethereum without the fear of losing your funds.
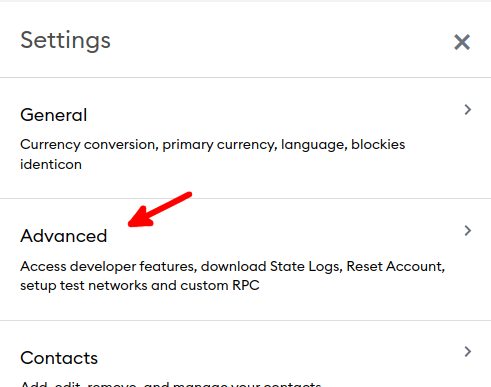
First of all, we need to connect our wallet to the Rinkeby network. To do so, we will be using the latest version of Metamask, so make sure you’ve downloaded and set up your Metamask wallet. Once you’ve done it, we need to enable the testnets. Begin by clicking on the Blocky avatar on the top right to access the Settings menu:

In the Settings menu, click on Advanced:
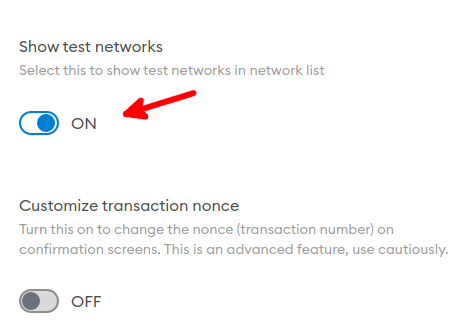
And scroll down until you find theShow test networks option. Enable it!
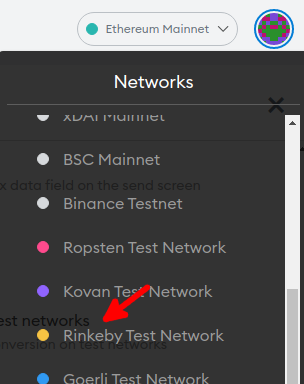
Now you should be able to see more networks when you click on the networks selection button. We are interested on the Rinkebynetwork:
Metamask will switch to Rinkeby,and you should see it on the upper part of Metamask:
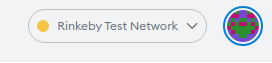
Well done! Now you are connected to Rinkeby! Finally! It’s time to get some money. Show me the money!
Get Some Rinkeby Ether
For the next step, we need to go to a faucet. A faucet is a place that drips Ether. These fantasy items only exist for the testnets and are used to get you started. The faucet will drip some Ether to your wallet, and then you can use it to deploy your NFT. For Rinkeby, you can find several faucets, but one of the more reliable ones is the Alchemy faucet: https://www.rinkebyfaucet.com/
Go there, and you will see an input field where you can paste your wallet address:

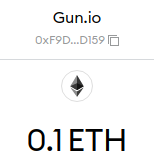
Click on Send Me ETH and after a while you should see 0.1 ETH added to your wallet:
Good job! Now we have some funds, and we can use those funds to deploy our beloved Niftie to the Rinkebytestnet. But wait! What about art? We haven’t yet used your amazing piece of art that will make the rounds on the internet of the future! To do this, we need to enter into the realm of Science Fiction and talk about the InterPlanetary File System!
IPFS
What is IPFS, the Interplanetary File System? Just like the blockchain, it is a distributed ledger that resides in every user’s computer around the world. IPFS uses this idea to leverage a distributed, decentralized, and censorship-resistantfile system where you can store anything you want–and where nobody can stop you!
IPFS has already been used by millions of people around the world, from DeFi protocols to free-thinkers and NFT artists. Once you upload a file to IPFS, it will stay alive forever!
How do you use it? Well, the easiest way is to do it through one of the public services that exist out there. There are a few to choose from these days, but one stands out–it’s definitely a number one hit!
Pinata
Welcome to the IPFS service that will keep your art alive and well. Pinata is a service that allows you to upload your art to IPFS. Once it’s done, you can use the URL pointing to your art and put it in our little Niftie to have a complete NFT! Let’s go!
Go to https://www.pinata.cloud/ and create an account. It will ask if you are a Builder or a Creator. It doesn’t matter, but you can choose the Creator option and go ahead. Once you enter Pinata, you will see this screen:

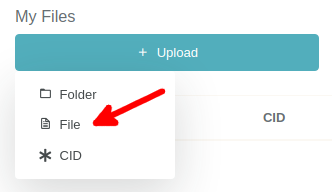
Here is where you can upload the art for your NFT. Click on the Uploadbutton and select File:
It will prompt you to upload a file:

Select the image that contains your art. I recommend the image to be a PNG or a JPEG image, so you can see your NFT in places like OpenSea. Click Upload:

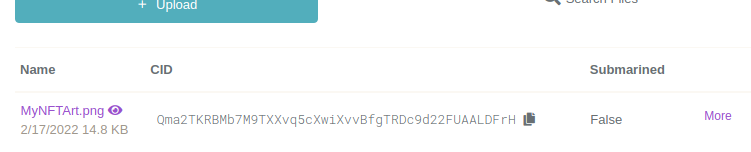
Pinata will upload your art to the IPFS network! You should now see something like this:
Done! Easy, right? Just to make sure everything is working fine, let’s test our new uploaded image. Just click on the name of your file in Pinata, and it will open a new tab with it:

If you can see the art in your browser, you did it. Your art is now part of IPFS, but it isn’t part of your NFT yet. Let’s fix that!
If instead of clicking on the name of your art like in the previous step, you right click on it, you can copy the URL for your art. Right click and select Copy link address. It should be something like this:
https://gateway.pinata.cloud/ipfs/QmVLc2iZfKE2RaaJ1GxtkH73UGH
…with a bunch of numbers and letters at the end. Don’t worry about those! You just need to make sure that if you put that URL in a browser, it will open your art. Save this URL somewhere, because we will need it shortly.
For our little Niftie to talk to websites like OpenSea, we first need to create a Metadata file. This Metadata is information we give to OpenSea about our NFT. It includes a description of the NFT, an external URL that we can use to point to our own website or anywhere we want, an image which is the Pinata URL for our art, and finally, a name which will be the same as our NFT namein the contract. Just create a file called metada.json, and include the following in it:
{
"description": "<Your description>",
"external_url": "<Your website>",
"image": "<Your Pinata art URL>",
"name": "Niftie"
}
Fill in descriptionand external_url as you please. Then, insert the URL you copied from your art in the image value. You should end up with something like this:
{
"description": "My very first NFT!",
"external_url": "https://gun.io",
"image": "https://gateway.pinata.cloud/ipfs/QmVLc2iZfKE2RaaJ1GxtkH73UGH",
"name": "Niftie"
}
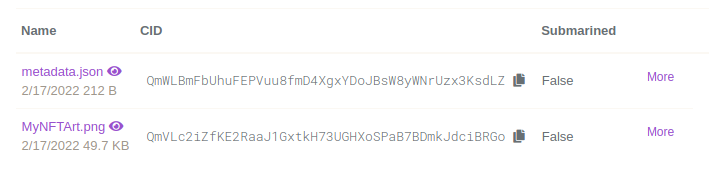
Amazing! Finally, upload metadata.jsonto Pinata, following the same steps you did for uploading your art. You should end up with something like this on Pinata:
Almost there! Now copy the URL for the metadata.json on Pinata. Remember, right-click on metadata.jsonand select Copy link address. If you do the same test and put it in a browser, you should see the contents of metadata.json. Save the URL for metadata.json. We need it for the next step!
Now we can put this URL in our little NFT. Do you remember when we wrote our tokenURIin the last article? Now is the time to make that variable useful! Copy the Pinata URL for metadata.json into the variable like this:
string[] publictokenURI=
["https://gateway.pinata.cloud/ipfs/QmWLBmFbUhuFEPVuu8fmD4XgxYDoJB"];
After doing this, check that Remix is still giving you the green tick!
We are almost ready to test our NFT in a testnet. We just need one small adjustment.
The Happy Sailor
To be able to navigate the OpenSea, an NFT needs to provide some more information so OpenSea knows the NFT is a valid one.
The NFT needs to tell OpenSea that it’s an NFT, and it does this by implementing a function. A function is a piece of code that can be called from outside the smart contract. It can do a lot of things, and more complex contracts have plenty of them. In our case, we only need two of these functions.
First, we need the supportInterface function. It will tell OpenSea that our Niftie is an ERC721 contract, which is indeed an NFT contract, as we explained in the previous article. You can do it by adding this code to the contract:
functionsupportsInterface(bytes4interfaceId) public pure returns (bool) {
returninterfaceId== 0x5b5e139f;
}
The function receives an interfaceId with 4 bytes, which is the amount of information passed to the function. Then it checks if the interfaceId is equal to 0x5b5e139f, which is the interface ID of the ERC721 format, and it returns the result of the comparison. When OpenSea asks Niftie if it “Supports the interface ID 0x5b5e139f”, our little Niftie will return true, which will make OpenSea happy!
We still need another piece of information. We’ve configured in our Niftie that we are the owner of the NFT, and although that should suffice, OpenSea is a bit picky. It needs to know that the NFT was transferred to our wallet at some point, otherwise it won’t show the NFT. We need to emit an event.Events in Solidity allow applications like OpenSea to check for them and learn that something has happened. This is simpler than going to the contract and asking all the time. Imagine that an event is like fireworks that can be seen from afar. When OpenSea sees the Transfer firework (event) it knows that something happened in the contract and asks the contract who got the NFT. We will need to declare the Transfer event:
eventTransfer(address indexedfrom, address indexedto, uint256 indexedtokenId);
The event will provide information about who gave the NFT (from), to whom (to), and which NFT it is in the collection (tokenId). When an NFT is first transferred, we use the wallet address 0 as the from wallet, signifying that the NFT is brand new. We can emit this event when our NFT is first constructed, and for that we use a special function called the constructor:
constructor() {
emitTransfer(address(0),ownerOf[0], 0);
}
The constructor function is executed when we deploy our contract to the blockchain–only that first time. So in this case, when we deploy our contract to the blockchain, we are signaling to everybody, “Hey! My wallet just got an NFT!”
This is the full code for Niftie:
// SPDX-License-Identifier: MIT
pragma solidity ^0.8.0;
contractNiftie{
string publicname= "Niftie";
string public symbol= "NFTY";
address[] publicownerOf= [0x2819c144D5946404C0516B6f817a960dB37D4929];
string[] publictokenURI= ["https://gateway.pinata.cloud/ipfs/QmVLc2iZfKE2RaaJ1GxtkH73UGHXoSPaB7BDmkJdciBRGo"];
eventTransfer(address indexedfrom, address indexedto, uint256 indexedtokenId);
constructor() {
emitTransfer(address(0),ownerOf[0], 0);
}
functionsupportsInterface(bytes4interfaceId) public pure returns (bool) {
returninterfaceId== 0x5b5e139f;
}
}
Ok! We are very close to the end! Now we just have to deploy the new version of our contract toRinkeby.Ready? Go!
Rinkeby Deployment
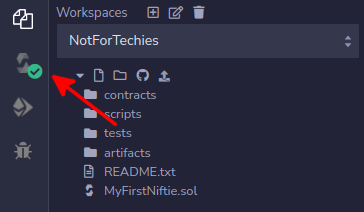
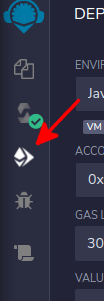
Finally, we are going to deploy Niftie to Rinkeby. In the Remix IDE,click on the Deploymodule:
Now we need to select Injected Web3 environment in Remix to connect to the Rinkeby network:

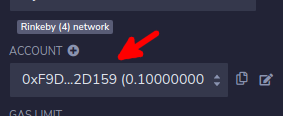
Notice that below, the drop-down menu says Rinkeby (4) network. The number 4 is the Chain ID of the Rinkeby network. If everything went well, you are connected to Rinkeby now, and you should see your wallet address on the Account section:
Now we are ready to deploy on Rinkeby! To do this, make sure you have Niftie selected in the Contract drop-down menu:

Then, click on the Deploybutton right below:
0
Metamask should pop up and tell you that you are trying to deploy a contract:

Make sure that it says Rinkeby Test Network on the top right corner and NOT Ethereum Mainnet. This step is very important, as we want to deploy to Rinkeby using the faucet funds, and not our own funds on Mainnet! If you’ve double-checked that it says Rinkeby Test Network, go ahead and click Confirm.
The transaction will be confirmed by Metamask after a few seconds. Rinkebyhas a delay of around 15 seconds, so wait a bit until Metamask confirms the operation. If everything went well, you should see your little Niftie popping up on the Deployed Contracts section in Remix:

This is similar to when we deployed internally in Remix. You can unfold the contract by clicking on the arrow to the left of the name NIFTIE, and you will see the same properties we saw last time plus the supportInterface function!
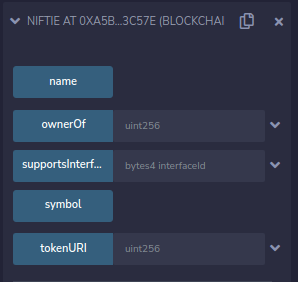
You can click on the name and symbol buttons to see our little Nifties properties. If you want to see the ownerOf and tokenURI,remember to fill 0 in the input field. If you want to try the supportInterface function, remember to pass 0x5b5e139f in the input field. It will look like this:

Now, into the final journey of our second act! Let’s see the result!
Sailing into the OpenSea
It’s been a long journey to get here, but we are now able to see the result of our efforts on the Rinkeby testnet!
Hopefully, OpenSea provides a testnet version of their website. This means that you can check if your NFT would work in the real OpenSea that is in Mainnet. Exciting, isn’t it? What are you waiting for? Go, go, go!
Oh–I forgot to tell you what to do. My bad! First of all, copy the contract address from Remix. On the Deployed Contracts section, you will see Niftie, a bunch of numbers, and an icon to copy the address. Click on it:

You will have copied the address of your contract. Something like:
0xd7183A516aBF7D814842DD1ca318e36edcE0A94A
Now go to https://testnets.opensea.io/get-listed/step-two.You will see the following screen:
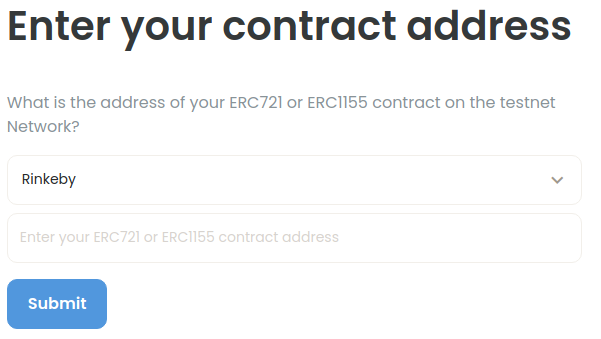
Make sure that Rinkebyis selected on the drop-down, and paste the address you copied from Remix in the input field:
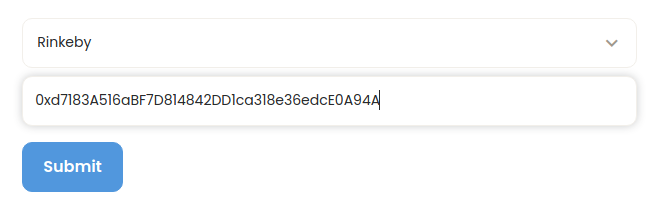
Click on Submit, and see how the magic happens!

Your own NFT is in the Rinkeby testnet! Congratulations! Now you can brag to your friends about your awesome NFT.
I hear you saying, “This is good, but it’s not the real OpenSea!”, and I feel you. You are right. For an NFT to be a real one, it has to go to the Mainnet, where the grown-ups are! Stick with us for the third and final installment of the series, where we will go to the Mainnet and beyond!
Stay tuned, my experienced developer! We are close to the end!
Roberto Cano is one of the many talented developers available to hire on the Gun.io platform. Check out his profile, or head over to his personal website, thesolidchain.com.
Interested in working with Roberto or one of our other amazing devs on Gun.io? We specialize in helping engineers hire (and get hired by) the best minds in software development.