
Building a personal assistant PWA: Part 1
In Part 1 of a 3-part series, Darko Bozhinovski efficiently demonstrates how to begin developing a progressive web app.
1. A personal assistant PWA
Ever since the beginning of my web development career, I’ve been bothered by an interesting question: How does one define a web application? Specifically, I’m curious about how one would define an application in the web world, particularly on a spectrum with completely static websites on one end and a fully dynamic, client-side rendered application on the other.
That question was a lot simpler to answer for the web of yore. Smartphones weren’t exactly “a thing” back then, and most things that we considered “dynamic” were simply done by the server–we got back a nicely formatted response from whatever we were trying to do. AJAX made the experience a lot more interactive, and ever since Dojo1, MooTools and jQuery, that answer became increasingly complex with every iteration that followed.
Backbone.js1, followed by Angular and React, opened the door for fully “appified” experiences on the web.
To add more complexity to the mix, native smartphone apps got increasingly popular and became the default for the regular user. They’re worth mentioning, since a large percentage of said apps communicate with a server somewhere to store and process data–the exact same thing modern web apps tend to do.
One advantage that native mobile apps have over web apps is that2 they’re offline and installed on the user’s device. Assuming that they were well-designed, at least a part of the application’s functionality would remain intact, allowing the user to interact with it, regardless of their current connection state.
In theory3, the web’s response to that would come in the form of Progressive Web Apps.
What are Progressive Web Apps?
To quote MDN:
Progressive Web Apps (PWAs) are web apps that use service workers, manifests, and other web-platform features in combination with progressive enhancement to give users an experience on par with native apps.
In fewer words, PWAs are web applications that behave closer to the expectation of a native application.
By now, you may be wondering why. Why would we want to do that for web apps? The answer to that is probably a lot deeper and more nuanced than my opinion, but I’ll give it a try. The average user’s default is using apps that exist as icons on their (often) mobile devices. However, having them in there in the first place requires installing them from an app store, which, more often than not, resembles a walled garden–not particularly good4.
Additionally, not all apps benefit from being native apps. For one, you’d find it very hard to convince me that a newspaper app has a legitimate reason to be a native app. So it’s only logical that if:
- A user wants to access apps from their home screen…
- A user wants to have an app-like experience (rather than the browser UI)…
- A user would like their app to work offline…
… it would make sense to “appify” web applications (or even static web sites, for that matter). In addition to that, the how-do-you-install-it story is significantly simpler than the app store experience (from a certain point of view). On the app store, you have the options of searching or browsing, using recommendations, etc. It could be hit or miss, depending on what you’re looking for. With PWAs, the only thing a user needs to do is browse the web, as one usually does. A website that they may frequent could often show a pop-up for them to “install”5 their PWA, and that’s that. The user in question had a “shortcut” on their home screen. In a way, you can view it as a glorified bookmark with superpowers.
Still, that doesn’t sound too different from what we already had with various “add to home screen” functionalities before. However, PWAs have more requirements to be PWAs, and they come with a bigger set of benefits because of that.
The requirements for a PWA
From a web application to a website and anything in between, to be considered a PWA, at a minimum it must:
- Use SSL. Non-HTTPS web applications aren’t considered PWAs.
- Have a web manifest for the application. A web manifest is a JSON file which contains some metadata for the “appified” version. More on manifest files
- Have a service worker, which is a special kind of Web Worker that is able to provide offline support, advanced caching control, run background tasks, and more.
In addition to the requirements, PWAs should follow these principles (to quote MDN):
Discoverable, so the contents can be found through search engines.
Installable, so it can be available on the device’s home screen or app launcher.
Linkable, so you can share it by sending a URL.
Network independent, so it works offline or with a poor network connection.
Progressively enhanced, so it’s still usable on a basic level on older browsers, but fully-functional on the latest ones.
Re-engageable, so it’s able to send notifications whenever there’s new content available.
Responsively designed, so it’s usable on any device with a screen and a browser—mobile phones, tablets, laptops, TVs, refrigerators, etc.
Secure, so the connections between the user, the app, and your server are secured against any third parties trying to get access to sensitive data.
That’s enough theory. Let’s get to writing our own PWA. Once we’re done, you should have a working PWA that just happens to be a chatbot–a chatbot that makes a semi-decent personal assistant, that is.
Bootstrapping a PWA
There are plenty of ways to get started with one. You can do it from scratch, use a boilerplate, or maybe use an automated tool to generate all of that for you. I’m fairly against re-inventing wheels and love automation myself, so for our sample app, I’m going to use Vite with Preact and a Vite plugin for the boilerplate parts of our PWA.
Note: The rationale behind these tech choices is simple: They are light and fast. One of the key points of having a PWA that has a good user experience is exactly that–having something that is light and fast. Nobody wants to look at spinners, waiting indefinitely for something to happen with an app. To reduce that, we’ll go fairly light with the stack. Of course, it can be even lighter, but at some point, you’re sacrificing dev speed and dev experience for a marginally smaller bundle. Since everyone’s tolerance to what constitutes a good dev experience is different, YMMV.
Vite starter and scaffold
Note: the final result can be cloned at https://github.com/DBozhinovski/PWA-Personal-Assistant. It contains the complete PWA chatbot for part 1.
Vite happens to have a decent cli, which we can use to generate the “boring” parts of our PWA. Assuming you have a reasonably modern node and NPM installed on your system, run:
npm create vite@latest
Yarn and PNPM work just fine with it too, if you happen to prefer those.
The result of running the command above is an interactive shell prompt, which asks you about the name of the project and technologies you’d like Vite to scaffold in for you. In our case:
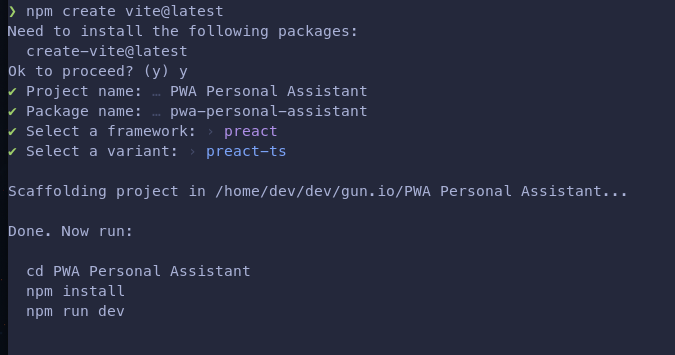
Note: I’d say going with TypeScript is optional here, in case you prefer using vanilla JavaScript. Following along shouldn’t be too hard, even with that difference.
Next up, run:
cd PWA\ Personal\ Assistant # or whatever you chose to name your PWA
npm install
Wait for the dependencies to finish installing (shouldn’t be too long) and voila! We have a web app ready. It’s not a PWA just yet, but a quick glance at our newly created package.json file tells us that we already have a working dev environment. To make sure everything works as it’s supposed to, run:
npm run dev #or vite dev, if you have the cli installed globally
That should start a server for our app at localhost:3000, which hosts an intensely purple page, looking something like this:

Aesthetic preferences aside, making a change in any of the files inside the ./src directory should trigger a live reload on the page and show the change we made. Since we’ll be building our own thing, we don’t really need any of the auto-generated stuff in there, so we can go ahead and:
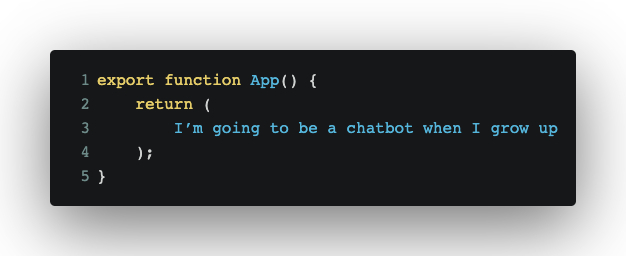
- Clean up
app.tsx– Remove everything in there except the exported App function, which returns an empty div element:
- Clean up
index.css– We don’t need any of the styling in there. - Delete any files that are unused. It’s not strictly necessary, but since we’re cleaning up, it will make for a cleaner experience overall.
What we get as a result is a bare-bones, unimpressive page with big dreams.

At this point, running npm run build generates a ready-to-deploy static web page, which isn’t a PWA just yet. To make it one, we’ll add the plugin I mentioned above:
npm i vite-plugin-pwa -D
After it’s done installing, add the plugin to the vite.config.ts file:

In addition to the setup above, we need to copy and install a few more things to set everything up (details here):
Install workbox-window as a dev dependency:
# For simplified worker communication – We won't be using this directly
npm i -D workbox-window
Declare some TypeScript types (optional if you’re going the JS route):

Additionally, the Preact setup for the PWA plugin for Vite includes two more files, which we’ll just copy and paste in the project, for the sake of dev speed. ReloadPrompt.tsx, ReloadPrompt.css
Note: The copying part is a bit hand wavy. However, we really don’t need to re-invent any wheels for update prompts here. What the plugin offers is more than enough, and it can be customized to look however we like.
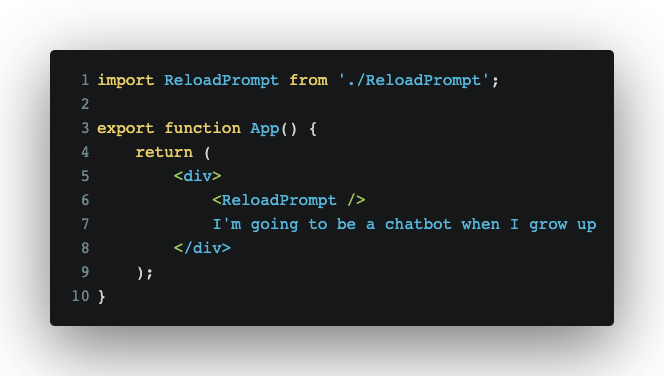
Finally, we’ll need to add the hand wavy part mentioned above as a component to our ./app.tsx file:
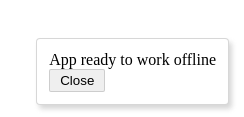
Initially, you should see no changes anywhere. However, if we build the project by using npm run build and serve the built application from a local server (Vite comes with a built in one, use npm run preview), we’ll see a little prompt in the bottom right corner:
We can easily test that claim by turning off the server and hitting reload in our browser. The page should still remain without showing us an error. I guess congratulations are in order, as we just made our PWA offline capable.
Currently, it’s a bit… basic, to put it mildly. Luckily, we won’t need a lot of UI for what we’re trying to achieve here.
Adding some UI and stubbing a basic chatbot
Our ultimate goal is a chatbot that may be a passable personal assistant. The way we’ll communicate with that bot is via a chat-like interface within our PWA. To achieve that, we’ll need two main components: chat input and chat history.
I’ll keep these fairly simple:
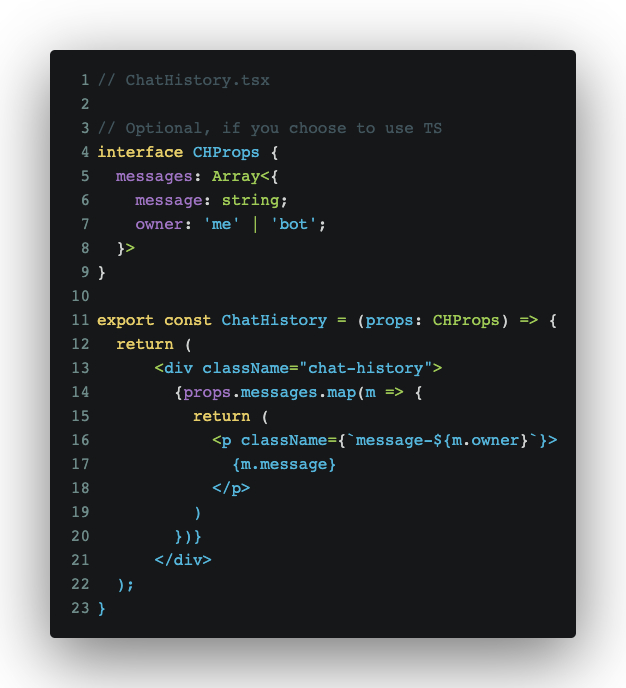
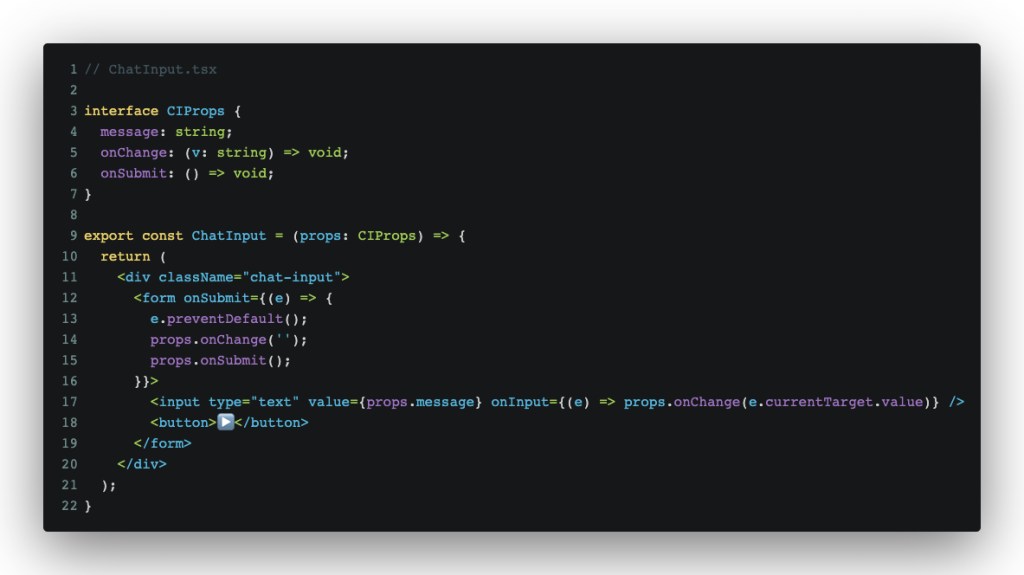
In short, these are in charge of the UI and contain some basic Preact logic to handle the events. If you’d prefer using React or anything else that is capable of running JSX, it shouldn’t be too different or hard to follow along.
There’s also a CSS file for some basic styles. Alas, my UI design skills are bad at best, so if anyone’s willing to help along with that, I’m open to PRs 😉
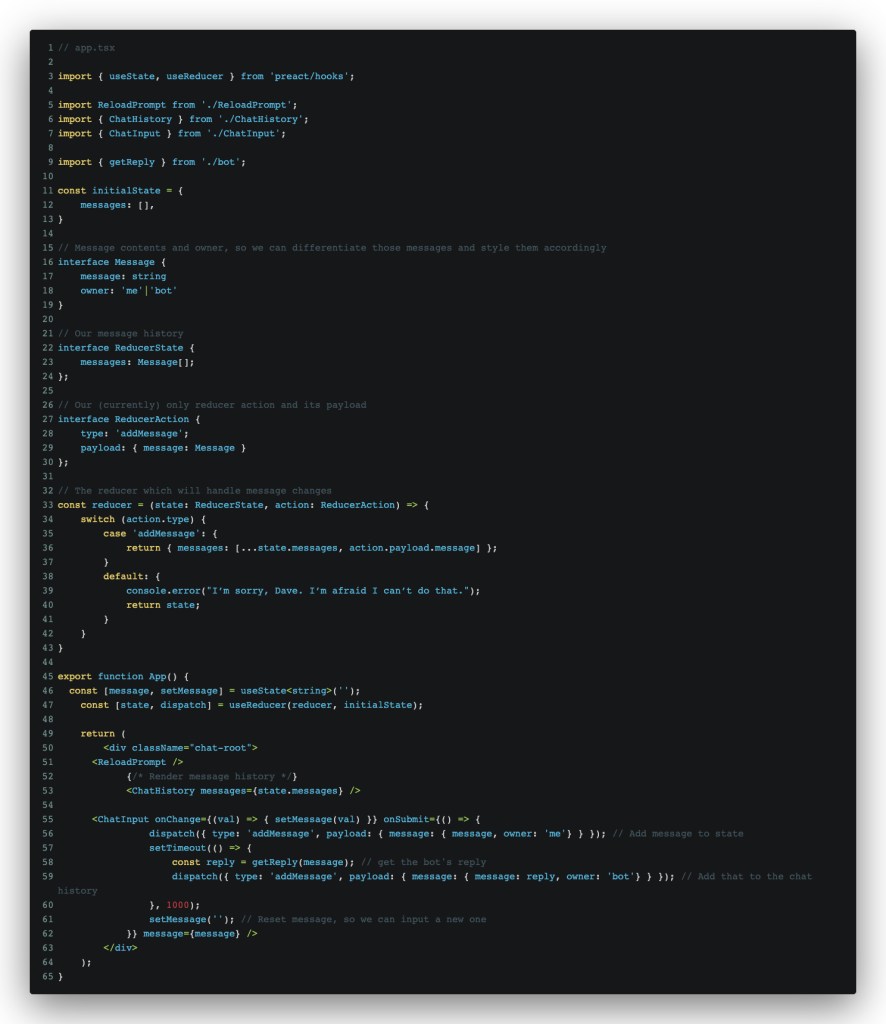
There are two more parts left: some very light state management and the chatbot stub, which we’ll improve in part 2. To make all of the components work together, we’ll need to add some code to app.tsx:
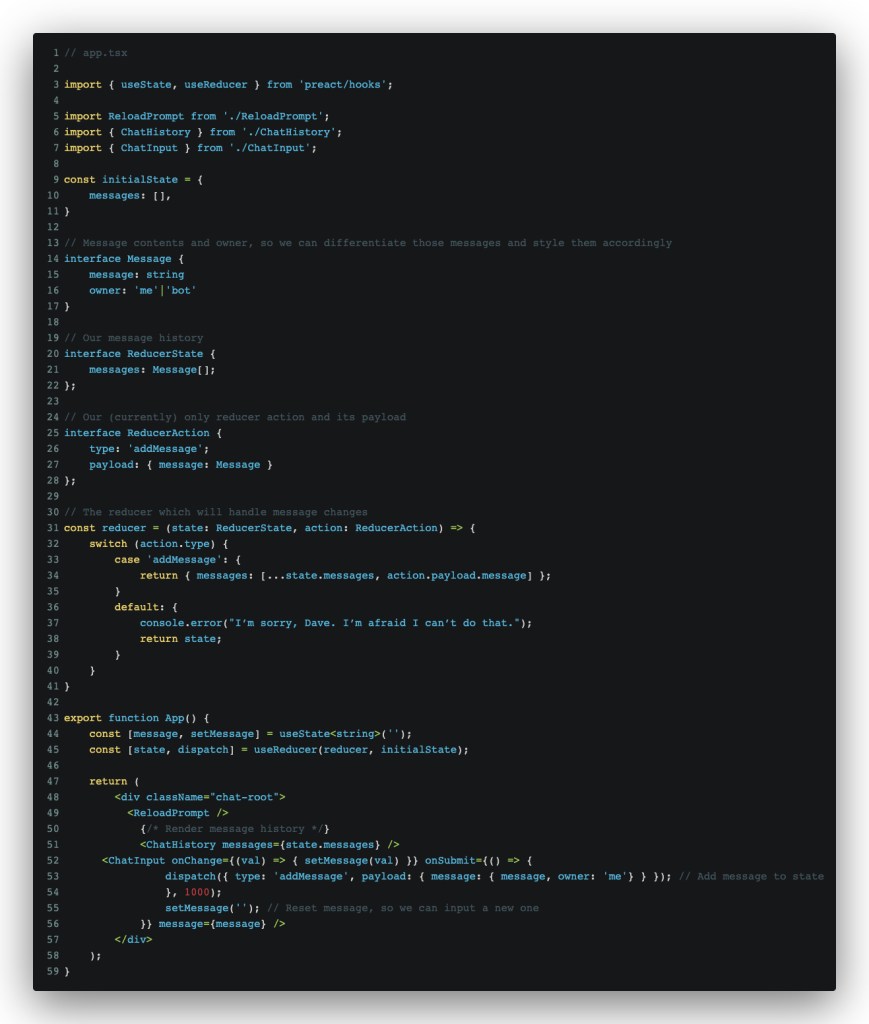
In a nutshell, we’re using useState to handle the changes from the message input and useReducer to store those messages for our ChatHistory component. Again, TS usage here is optional, and opting for vanilla JS instead makes for less code in this file.
Finally, we’ll need our chatbot stub, which is admittedly very basic and boring at this stage:
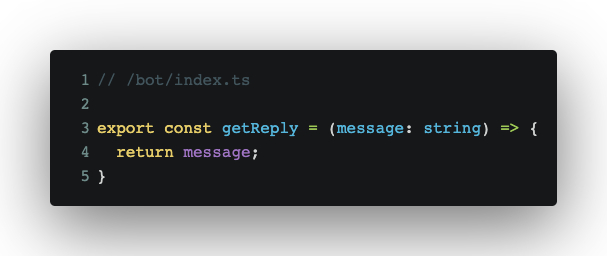
A few small changes to app.tsx, to add to our not-so-smart bot:
With that, we have an offline capable PWA with a not-so-useful personal assistant wannabe, which we’ll make smarter in our next installment.
Takeaway
Using Vite, Preact, and the PWA plugin, we were able to quickly bootstrap a parroting chatbot, which is offline capable. Thanks to the PWA plugin, we even get a prompt that our application is offline-ready, and we’ll be able to run it, even if our server is down and our connection happens to falter (if we were to host it somewhere–which by the way, is totally possible, even now).
In part 2, we’ll make the bot useful by making it remember stuff, understand our messages, and reply in a meaningful way.
- The technologies listed are just an overview–highlights from my previous dev experiences. There were a lot more that made the web what it is today, but there’s no point in listing all of them here.
- Obviously, we’re ignoring performance here, but that’s a complex topic which I’d rather avoid to focus on the rest of it.
- In theory, this is simply because of browser support. Some browsers out there aren’t particularly friendly to the idea of a PWA. Feel free to make your own guesses and do your own research. I’m not looking to throw more fuel on that particular fire.
- Walled gardens tend to be anti-competitive, which feels like a bad thing. Again, since this is a hot topic with a lot of opposing views, I’d happily skip getting into more details here.
- Perhaps using “install” is pushing it a bit. The behavior of what “install” means in this context is closer to how you would put a bookmark on the home screen, rather than downloading a blob from an app store.