
Building a personal assistant PWA: Part 2
Building a personal assistant PWA – Part 2/3
In Part 2 of a 3-part series, Darko Bozhinovski dives deeper into PWA development; refining his chatbot and equipping it with an arsenal of dad jokes.
In Part 1, we managed to create a fairly basic parroting chatbot that, admittedly, isn’t too useful. However, it was packaged as a progressive web app, which runs offline, has update prompts, and is lightweight.
In this installment, we’ll try to make the bot a bit smarter and give it some utility. After all, it has the ambition of becoming a personal assistant, so let’s help it along!
NLP basics
First, a bit of theory: In order for our chatbot to understand written input, it has to be trained to do so–much in the same sense as we, as a species, teach children how to speak and understand the world around them. This is where natural language processing (abbreviated as NLP) comes into play. Put simply, it’s a sub-field that sits at the cross-section of a bunch of science branches with the goal of allowing machines (chatbots, in our case) to understand human-written language.
While the field itself is quite large and has a lot of different branches and tools at its disposal, we’ll only need two for our chatbot: intent classification and named entity recognition.
Intent classification
Intent classification is a way to categorize a sentence to a pre-defined group. It’s a statistical tool that allows a developer to classify a human-written message against a group of sentences (text corpus).
For example:
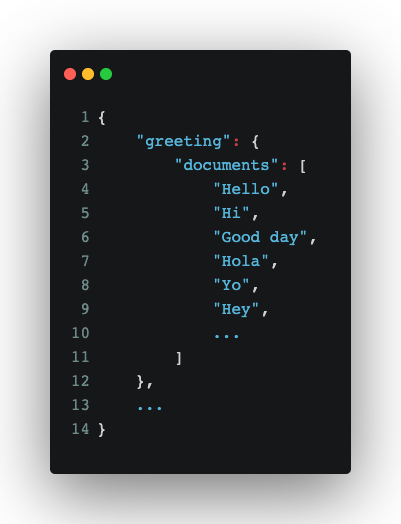
In the JSON block above, we have a set of greetings. Using the array under documents as training data for our (still theoretical) intent classification system, we’d ideally get the following output running a sentence through our system:
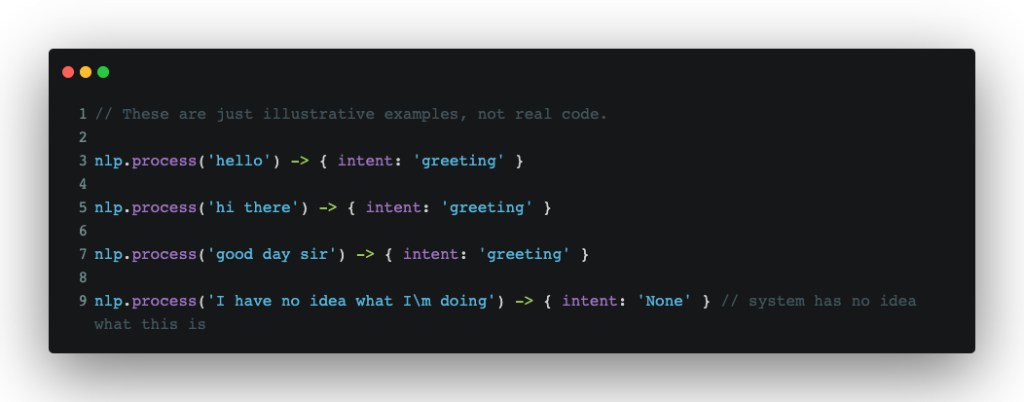
There are two things to note here. First, an intent classification system isn’t a precise system, in the sense that it needs an exact input to provide a meaningful output. If it sees a word that is classified as a greeting in our text corpus from a given user input, chances are, it will still get classified as a greeting[1]. That fuzziness is exactly what allows us to process human-written input and give meaningful responses back. Second, there will be times when the system will have quite literally no idea what the given input is. The special None intent helps us with that–it will at least allow us to tell a user that we have no idea what they’re trying to do and adapt accordingly.
Named entity recognition
While intent classification gives a general categorization to a sentence, named entity recognition helps with understanding the meaningful parts of a given sentence. Consider this: Once you remove stop words[2] and general “noise” from a sentence, you’re usually left with the important bits (from the perspective of a machine). Still, understanding those bits requires tagging them in a certain way. This is where named entity recognition (NER for short) comes in. NER can help the machine understand whether a certain word is a person, a place, an animal, a plant etc. In turn, this affords us developers the ability to program said machine to extract data and improve the UX for our users based on their input–learning about the user, if you will. I’m staying away from using “machine learning” and “artificial intelligence” as terms, simply because those are fairly more complex and are wider fields in general, compared to what we’re doing here–even though NLP can be considered a part of ML and AI.
For example, using the sentence “My name is John”:
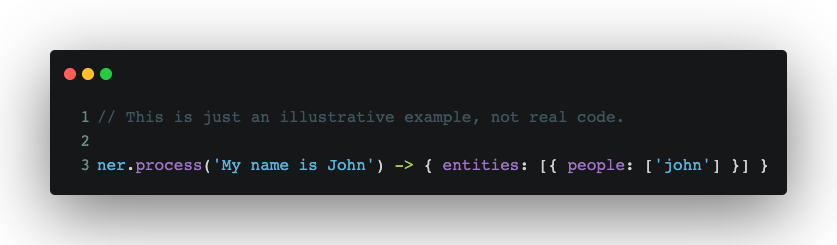
NER would provide us with information on what “John” means, so we can act upon that information. For example, it would ask and remember the names of our users to provide a better UX.
Putting it all in practice
For the purpose of making our Chatbot PWA smarter, we’ll add two libraries to the mix:
- nlp.js– A general purpose NLP library with a LOT of utilities. We’ll only be using the intent classification part of this library.
- compromise.js– Also an NLP library, but with a very good NER/part of speech recognition tooling, which happens to be very lightweight and browser-friendly. We’ll be using compromise for the NER part of our app.
So, to kick off the practical part of this article, type:
npm i -S @nlpjs/core @nlpjs/nlp compromise
Next up, we’ll create a few files for our bot:
src/bot/data.ts– the structured training data (text corpus) for our botsrc/bot/bootstrap.ts– the training and initialization entry point for our botsrc/bot/skills.ts– our bot’s superpowers, related to data processing
Training data
We’ll start with the training data, since that’s what makes our chatbot know how to respond. Let’s create some data to teach our bot how to greet a user:
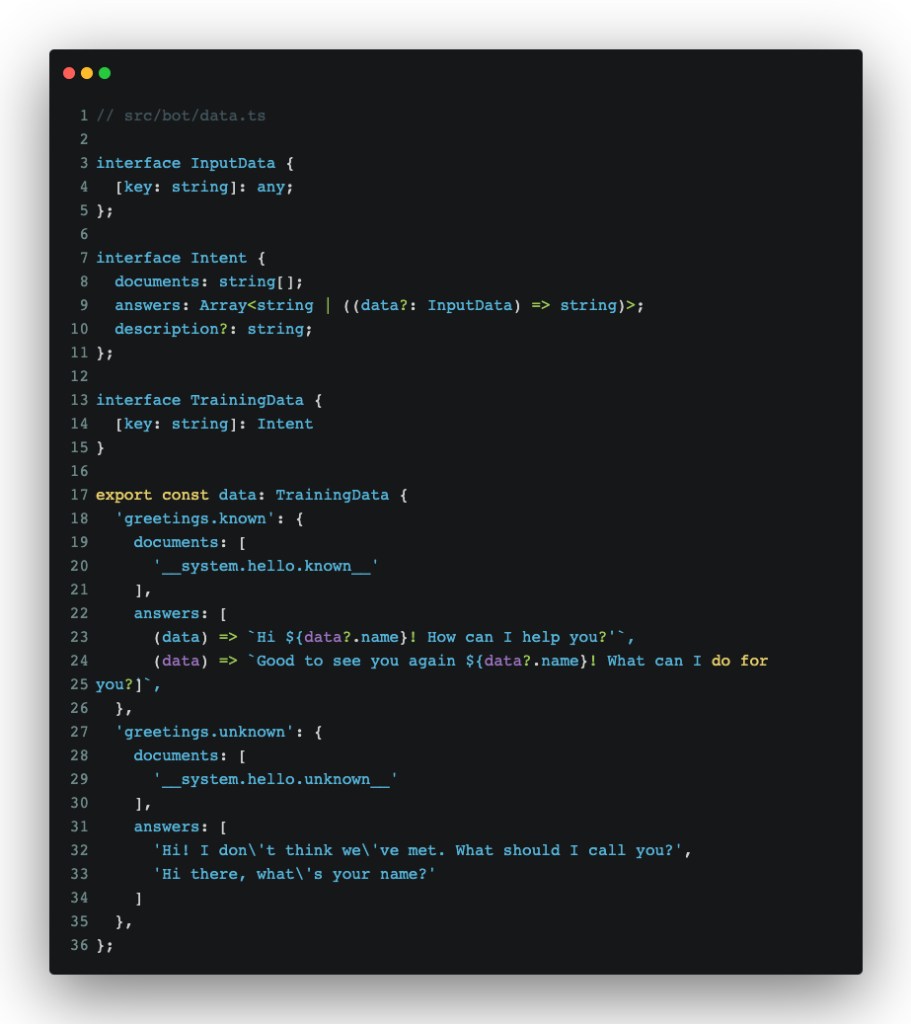
Before we go into how we’ll use this, let’s go over the data structure:
- Each key in the
dataobject is a name of an intent, or how we’ll classify user input towards a meaning. - Each intent contains at least a
documentsandanswers, plus an optionaldescriptionfield:documentsare samples against which our bot will be trained to calculate intent withanswersare, well, answers that our bot will give back once said intent is triggered. They can either be plain strings or functions that return a string, which can contain some data we pass from our bot’s knowledge base.descriptionis something we’ll make use of later. It’s used to describe what a certain intent is actually meant to do.
*Note: __system.hello.known__is a hack I started using quite a while ago. Basically, it tells the bot that a phrase formatted in that particular way has a special meaning and isn’t meant to be treated as a human-written text. I often use those to trigger the start of a conversation for a bot that cannot proactively start a conversation. There are, of course, cleaner ways to achieve the same goal, but this one was the easiest method that I could think of, given the type of app.
With some training data ready, we can start training our bot.
Training our chatbot
As scary as it may sound, in this case, training is quite simple. It’s just a matter of telling nlp.js what documents we want mapped to which intent:
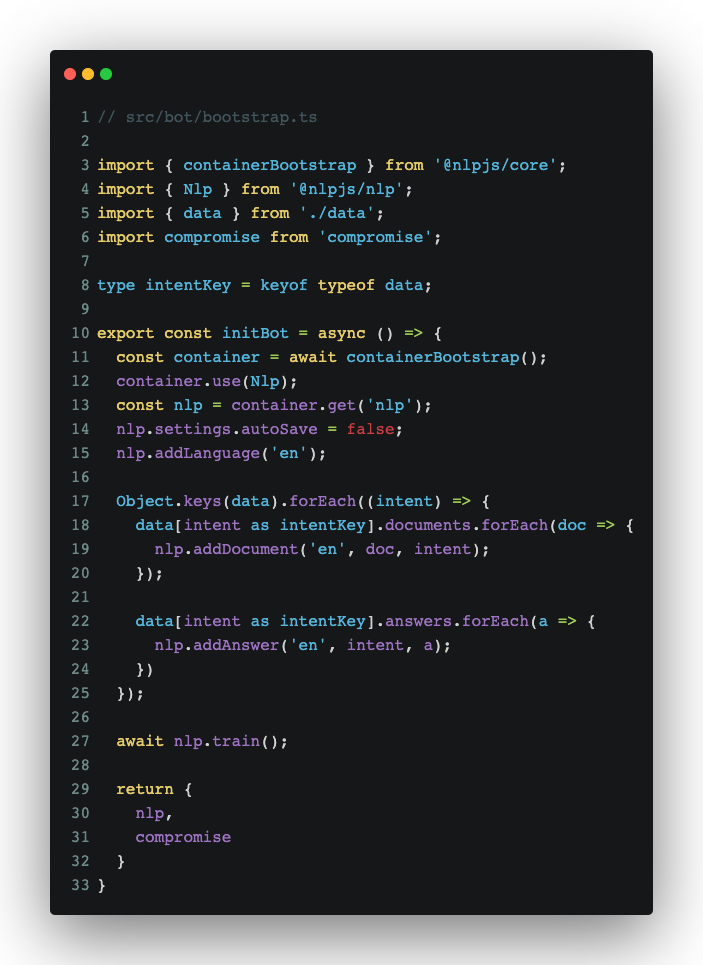
Let’s do a quick overview of what’s going on, code-wise:
- For the two
@nlpimports:containerBootstrapis a so-called container system which nlp.js provides to serve as a central repository for all plugins, settings, and pipelines used by nlp.js. TheNlpimport is exactly what we’re using for intent classification and calculating answers based on intent. - The
compromiseimport is one that we’ll use to break down sentences and do NER and part of speech tagging on the user-entered sentences that we’ll need to extract data from. - The
autoSavesetting is something we need to put in there, since it only works server-side. It’s used to automatically save settings and data when used in a server-side environment. - We’re setting the language to English with the
nlp.addLanguage('en')line. - The training setup is pretty simple, considering how we formatted data with object keys being intents; each of which containing an array of documents and answers. It’s simply a matter of telling nlp.js which document and answer maps to which intent. That’s exactly what we’re doing with the two
forEachloops. - Finally, running
await nlp.train()tells nlp.js to train the classifier for us, after which we can use it to process data.
Chatbot’s first greeting
Finally, we’ll need to tweak and add a few lines to src/bot/index.ts and src/app.tsx to have our bot greet us:
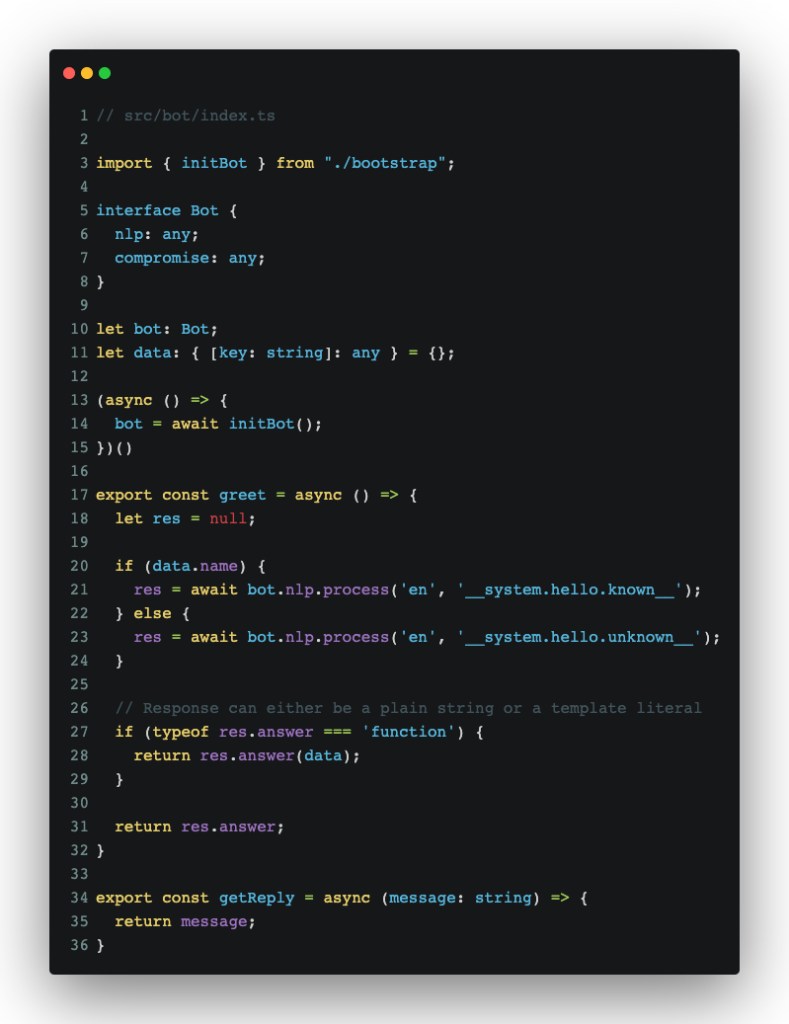
What we’re doing here is initializing the bot and adding a greet function, which will allow us to trigger a greeting message from our bot.
In src/app.tsx, we’ll need to add a small useEffect statement, which will allow us to trigger an opening message:

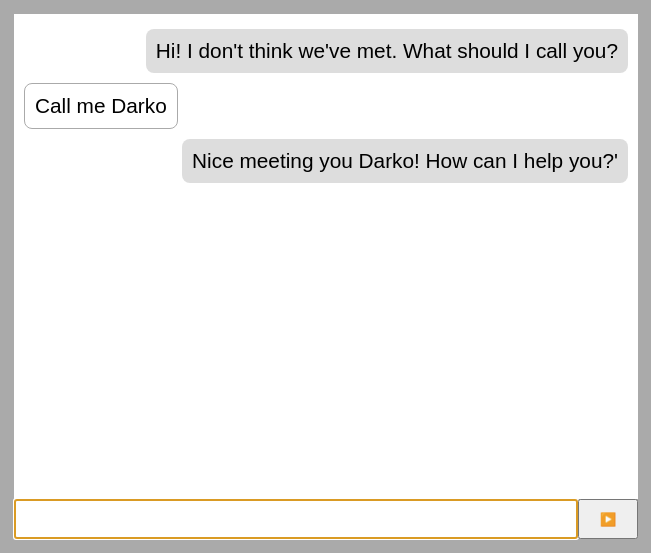
What that does is reuse the existing reducer that we were using in Part 1 to add a greeting message. With that, we should be able to see something like this on screen:

Each reload should give us a randomized message. Our bot still parrots our messages, so at least it hasn’t forgotten any skills that it used to know (yet).
How do we make it remember and say our name, though? That involves a few more tweaks to our training data and a short trip to `src/bot/skills.ts`.
Chatbot learns!
Let’s start with the easiest part: training data. We’ll add a new intent to `src/bot/data.ts`:

This addition follows the same structure as our previous two intents. Note that the #Name part could really be anything (it could be even left empty), since this is a statistical model. I’m simply using such a notation for clarity and readability.
Next up, we’ll tweak getReply and the async init IIFE in src/bot/index.ts and src/bot/skills.ts:
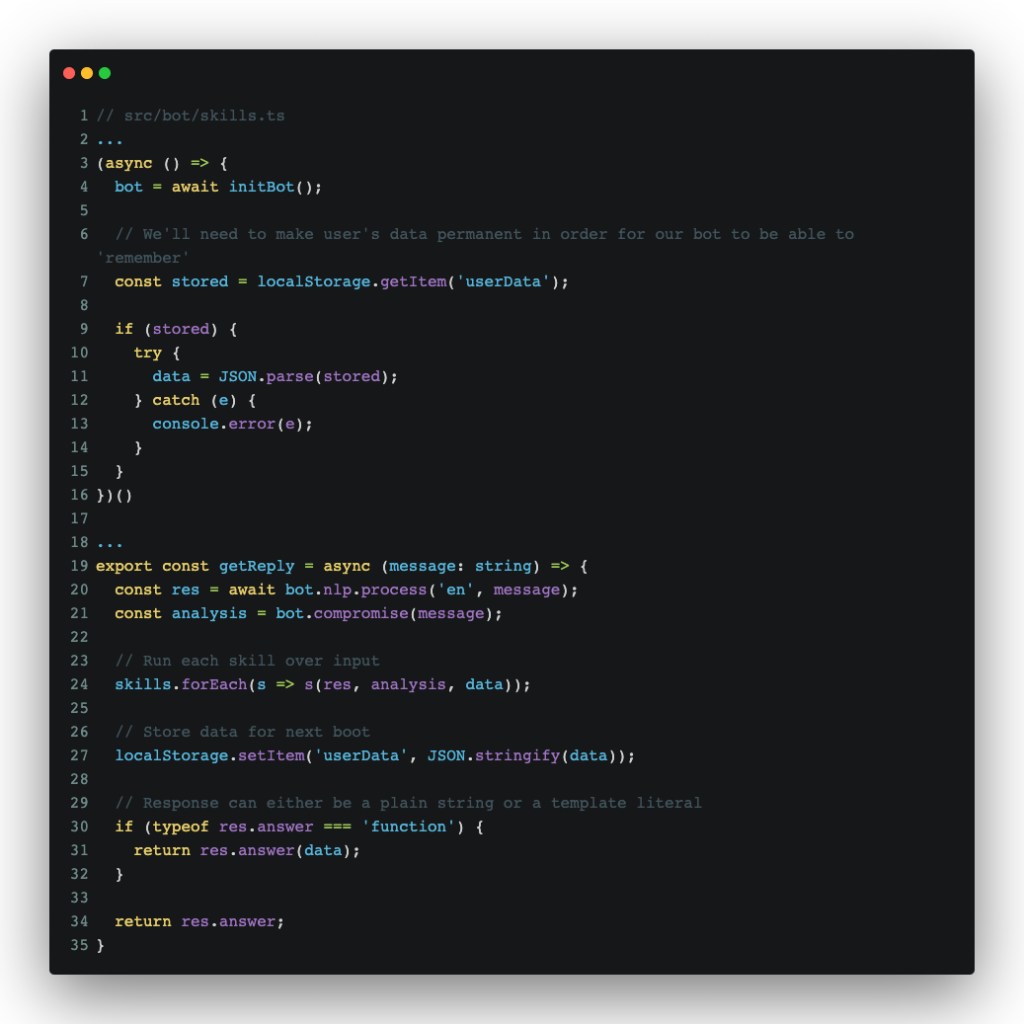
The purpose of these changes, in order:
- Use localStorage as a permanent “brain” for our chatbot
- Process user input using `nlp.js` and `compromise`
- Pass said processing to skills, which are just functions that do stuff with the data they’re provided
- Respond based on the NLP training
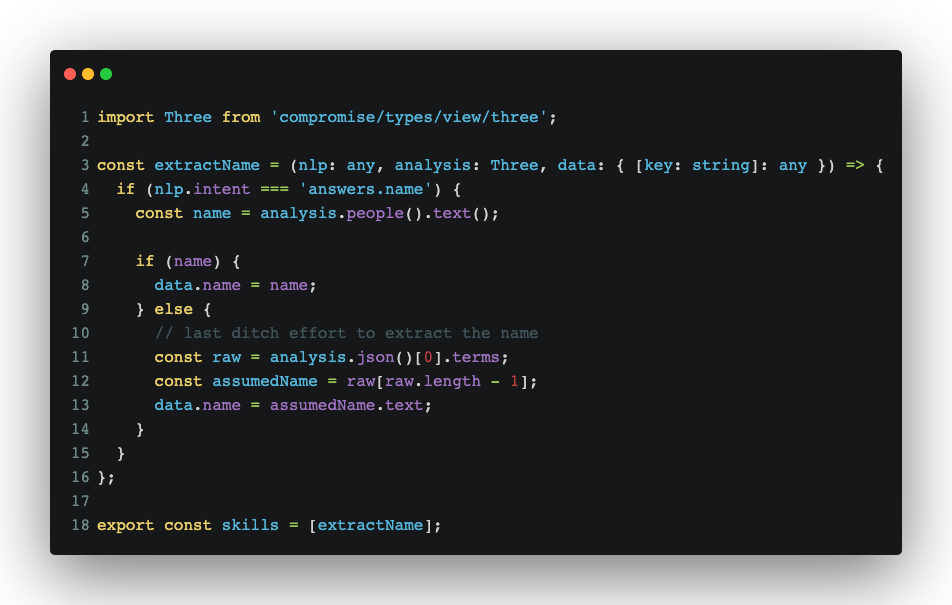
- Add a name extraction skill:
- We pass both nlp and compromise to the function. Nlp provides us with the intent context and whether that skill needs to trigger on that intent, while compromise allows us to extract the name of the user.
- If compromise detects a name (person), we simply add it to the data object (which later gets written to localStorage and can be used in our bot’s replies).
- Since we’re assuming they’re using English, that means that some names won’t get recognized as names. To hack around that, we’re assuming that the last parsed term is a name and using that. It’s not the best approach, but it will suffice for our needs.
With that done, we should be able to see something like this on screen:
Try reloading afterwards to test whether our chatbot truly remembers your name. 😉
Help and None intent
Our latest tweak to getReply has an unfortunate side-effect: If nlp cannot classify an intent based on training, it returns empty messages–not ideal. To fix that, we’ll add two more new intents to src/bot/data.ts:

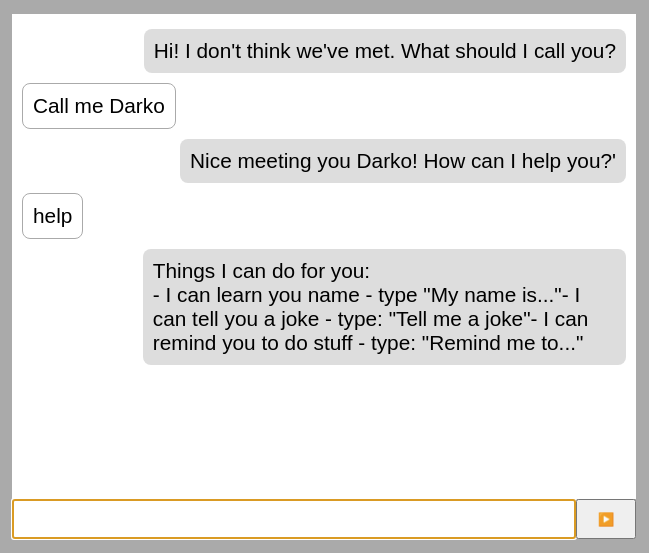
With those two added, at the very least, we’ll never run into a situation we can’t handle.The bot will simply return an honest message about what it knows how to do. When a user types something like help, they get a list of all intent descriptions (except the special ones). On the topic of special intents, `None` is also a special intent in the nlp.js library. When the match for any existing intent is considered low, it will classify that sentence as `None`, allowing us developers to act accordingly and show some helpful info back.
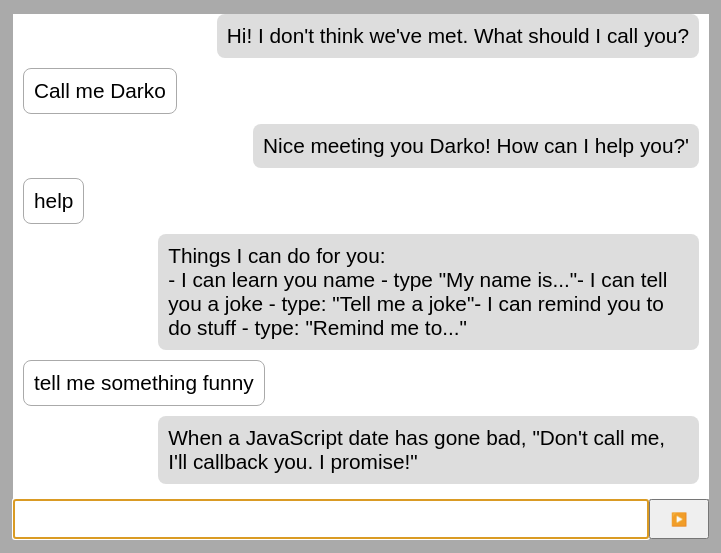
In practice, our latest changes look something like:
We’re getting a bit ahead of ourselves with that message there, so let’s add two more skills to our bot before wrapping this up.
Bot learns how to tell jokes
Nowadays, npm is loaded with all sorts of libraries and utilities. One such library that I recently discovered is https://github.com/elijahmanor/devpun. Its premise is simple: Run a function, get a dev related joke back–which, of course, we can use to teach our bot how to be funny:
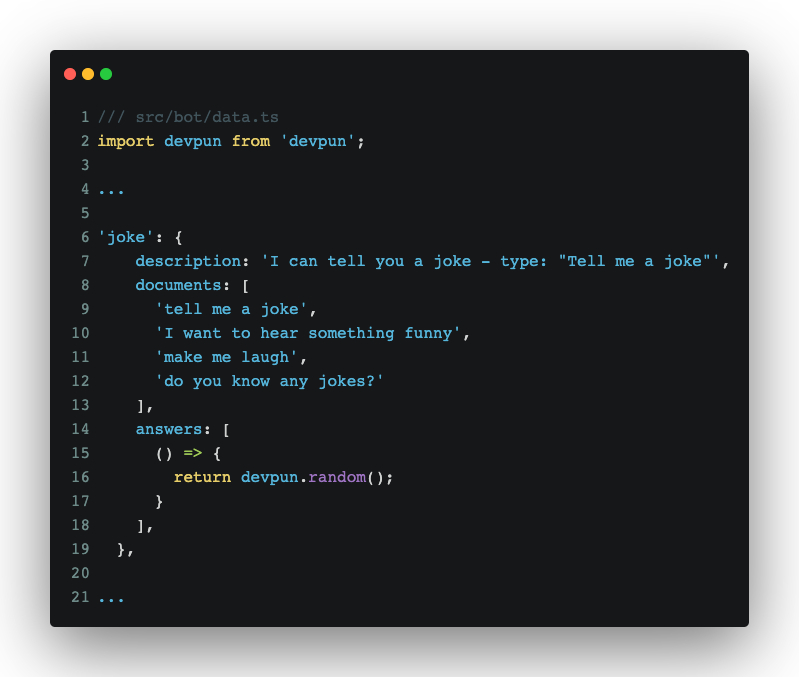
With a really small addition to data.ts, our bot now knows how to tell jokes:
So maybe–just maybe–our bot could become a stand-up comedian? Probably not, so let’s teach it how to set reminders.
Bot learns to be a personal assistant
The last thing we’ll teach our bot in this installment is to remind us of upcoming tasks.
First, we’ll add a plugin for compromise to enable it to understand dates and times and a small utility to execute stuff on a given date:
npm i -S compromise-dates set-dateout
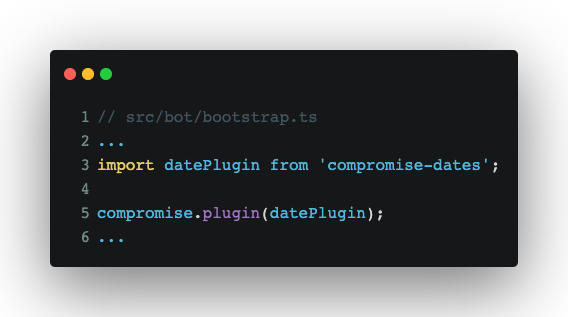
Then, we’ll initialize the plugin in src/bot/bootstrap.ts:
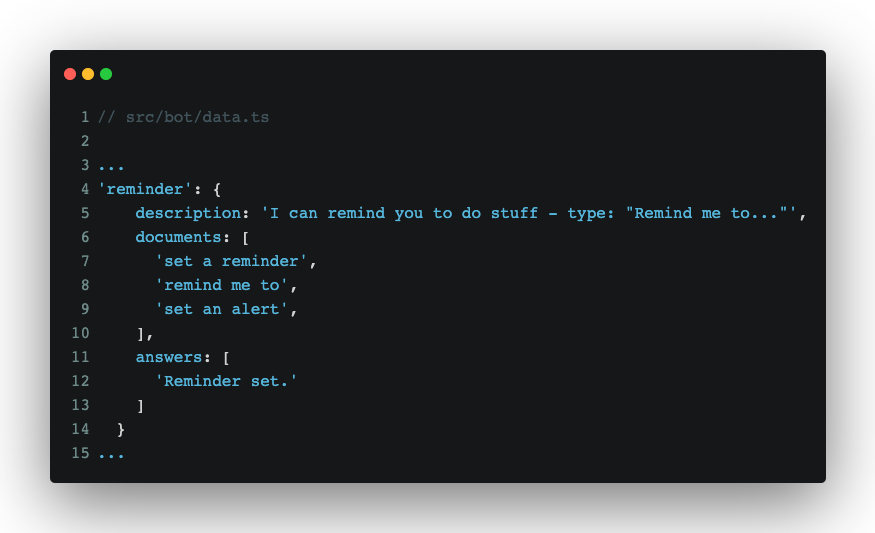
With that added, we can use .dates() on our compromise analysis to extract times and dates. Next, we’ll add some data for a new intent:
Followed by a new skill:

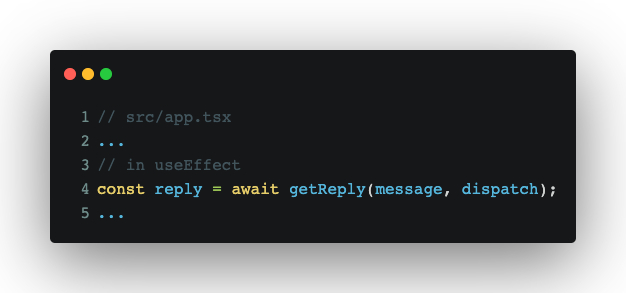
And finally, a small tweak in src/app.tsx and src/bot/index.ts to make sure we’re passing dispatch to our skills, for the purposes of scheduling a reminder message:

With that in place, our bot can now remind us of stuff we tell it to:
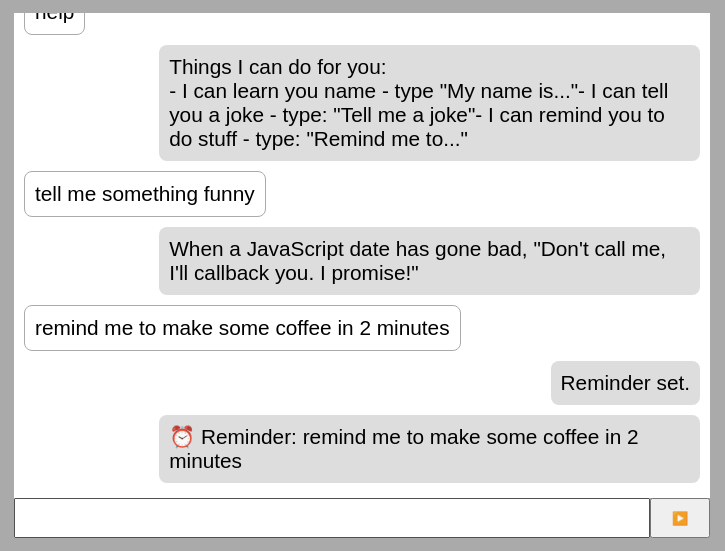
Finally, our bot can be considered useful for something. The compromise plugin can parse a pretty wide range of dates and times, so feel free to experiment and see at which point you’d trigger weird behavior! 😉
Takeaway
Part 1 left us with a parroting offline chatbot PWA, which wasn’t too useful. In this installment, we made the chatbot able to remember a user’s name, greet them, tell them jokes, and finally, remind them of a task (after all, it still wants to be a personal assistant when it grows up).
Thanks for reading. Join me for Part 3, where we’ll add some more bells and whistles to the app (perhaps even more modes of input ;)) and discuss PWA packaging and distribution.
—
[1]: It’s fairly more complex than that, but we’re trying to fit it into a ~2000 word article. Besides, these are just the basics, so for the most part, that description is accurate.
[2]: Stop words are words that can be considered “filler” words, seen from the perspective of a machine. For example, in a sentence such as “What is a computer?”, stop word filtering usually leaves you with the word “computer”. More often than not, that’s enough to understand what a user is trying to get. Search engines usually operate in a similar fashion.